phpPgAdmin On Linux On Windows With Vagrant

This tutorial is a continuation of Rails On Linux On Windows With Vagrant.

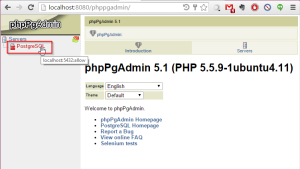
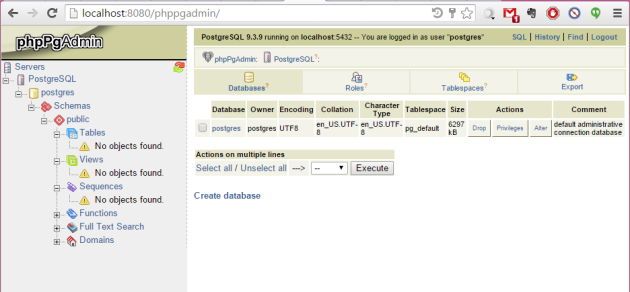
What we want to achieve at the end of this tutorial is to able to modify our PostgresSQL database from a convenient web interface (phpPgAdmin) directly from the web browser in our host machine. Observe:

2015-09-18 21_19_47-phpPgAdmin

Let’s roll:

Port Forwarding

For this to work, we need to forward the port 80 in our guest machine to port 8080 in our host.

If you are in SSH mode, exit it by entering

exit

Then halt it:

vagrant halt

In the Vagrantfile in your project directory, uncomment the following line:

config.vm.network "forwarded_port", guest: 80, host: 8080

Though not apparent in the Vagrantfile here, the virtual machine we used forwards port 3000 in the guest machine to port 3000 in the host machine. That is how we are able to access our Rails application from the host machine. You can find it here:

C:\Users\YOURUSERNAME\.vagrant.d\boxes\fiercepunchstudios-VAGRANTSLASH-vagabond\0.1.1\virtualbox\include

In “_Vagrantfile” (the only file in that directory), you can peek in its contents:

Vagrant.configure(2) do |config|
 config.vm.network "forwarded_port", guest: 3000, host: 3000
end

Install phpPgAdmin

After you have ran vagrant up and vagrant ssh, in git bash enter:

sudo apt-get update
sudo apt-get install phppgadmin

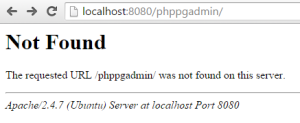
Congratulations! You have installed phpPgAdmin, but when you go to its URL – http://localhost:8080/phppgadmin/ (make sure its all in lower case), you get a page not found error:

2015-09-18 20_46_29-404 Not Found

It’s not all bad. At least we know Apache Server is running.

Setup phpPgAdmin

So now we need to configure Apache server to tell it where to find phppgadmin. Edit /etc/apache2/apache2.conf

sudo nano /etc/apache2/apache2.conf

and add the following line to it:

Include /etc/apache2/conf.d/phppgadmin

If you’re not familiar with nano, just press the down key till you reach the end of the document. Copy paste the line above and press Ctrl-O (save), Enter (confirm overwrite), followed by Ctrl-X (exit).

When you have done this, restart apache:

sudo service apache2 reload

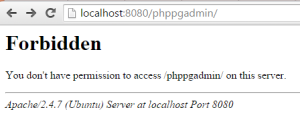
Now when you try to access phppgadmin (http://localhost:8080/phppgadmin/). The error message changes:

2015-09-18 20_54_01-403 Forbidden

Basically its trying to say that phppgadmin is there, it’s just that you don’t have permission to access it. So let’s change that now. Enter:

sudo nano /etc/apache2/conf.d/phppgadmin

Comment out (add # at beginning of line) “allow from 127.0.0.0/255.0.0.0 ::1/128” and remove # from the line below it, “allow from all”. Your file should look like this:

order deny,allow
deny from all
# allow from 127.0.0.0/255.0.0.0 ::1/128
allow from all

Save it out and restart apache again, now try to access phppgadmin again. You should be able to see the site now. Though it’s not apparent what you should be doing (contradictory to a more user-friendly web client, phpMyAdmin), click “PostgreSQL”:

2015-09-18 21_01_07-phpPgAdmin

…and it prompt for your login. What’s the username and password? Default username is postgres, but you need to set a password. Let’s do that now. Enter:

sudo -u postgres psql postgres

That should take you to psql:

2015-09-18 21_09_35-MINGW64__d_HashiCorp_Boxes_vagabond

To set a password enter:

\password postgres

It will prompt you for the password, which you will not be able to see it as you type. This will be the password you will use to login to phppgadmin.

To quit psql, enter:

\quit

If you try to login now, it will block you with the message:

Login disallowed for security reasons.

Well, we’re not so bothered about security reasons at the moment, so in git bash enter:

sudo nano /etc/phppgadmin/config.inc.php

and change

$conf['extra_login_security'] = true;

to

$conf['extra_login_security'] = false;

and try to login to phppgadmin again (again, username is postgres). It should work now.

Troubleshooting PostgreSQL

You might encounter this FATAL: role “vagrant” does not exist error:

FATAL role vagrant does not exist Action Controller_ Exception caught

To fix the vagrant role problem, enter this code in ssh mode (make sure you shut down your rails server first):

sudo -u postgres createuser -s -d -r -e vagrant

That should resolve that issue. Note that you need to execute all postgres commands the same way (prefix “sudo -u postgres“). For example:

sudo -u postgres createdb TimeTabler_development

You may also realize that you also can’t access the psql for the exact same error. To work around this, access psql like this:

sudo -u postgres psql postgres

You exit the terminal as such:

\quit

Conclusion

Once you’re done playing around, you can halt the virtual machine by first exiting SSH, then halt the virtual machine:

exit
vagrant halt
 

Rails On Linux On Windows With Vagrant

Rails not running properly on Windows? In this quick tutorial I’ll guide you how to get Ruby on Rails running in Ubuntu in Windows via Vagrant and Virtualbox; it’s the fastest way of getting up with Rails I’ve found to date.

Let’s begin:

Install

You will need to restart your computer after installation for vagrant commands to work.

Setup Vagrant

Create a new folder for your Rails project.

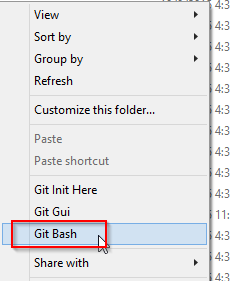
Now inside that folder, right click on on a blank area. If you have git installed properly, you should be able to right click and see a context menu option called “git bash”:

2015-09-18 14_07_41-vagabond

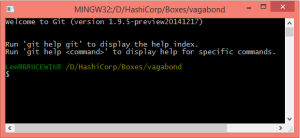
This will open a git bash terminal. From here you will execute all vagrant commands:

2015-09-18 14_09_16-vagabond

Enter:

vagrant init fiercepunchstudios/vagabond

You will see a “Vagrantfile” added to the folder. Now Enter:

vagrant up

This will download a virtual machine (pretty big file, about 700Mb) from atlas.hashicorp.com and save it to:

C:/Users/USERNAME/.vagrant.d/boxes

There you will find a folder for each virtual machine you downloaded.

NOTE: If the download gets interrupted, vagrant will not be able to resume. You’ll have to delete the incomplete box file in

C:/Users/USERNAME/.vagrant.d/tmp

Create Rails Project and Start Running

Once all that is completed, the vagrant up command also launches your virtual machine, though you can’t see it. Enter in git bash:

vagrant ssh

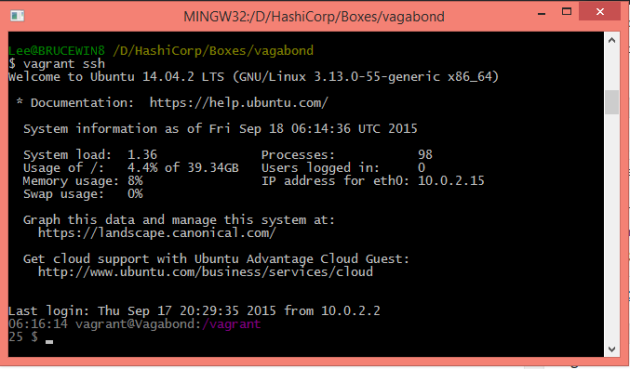
Note you can only do this after you have run vagrant up. This will place you inside the Ubuntu virtual machine (we call this the guest machine, the environment you are currently using will then be the host machine):

2015-09-18 14_16_39-Edit Post ‹ Bruceoutdoors Blog of Blots — WordPress

It should place you inside a “vagrant” folder (notice the vagrant@vagabond:/vagrant), which is the project folder you have created in your host machine. It is here we create a new rails project. So now enter (Don’t forget that full-stop):

rails new .

This also requires an internet connection. After this runs you should see your project folder populated with a fresh new Rails project. So now you can use your favourite IDE, editor (Ahem, Geany) and git client (Ahem, SourceTree) right in Windows! How cool is that?

To run a Rails server, enter in your git bash:

rails server -b 0.0.0.0

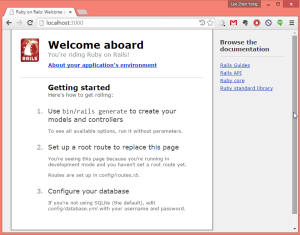
Now open up your favourite web browser and go to http://localhost:3000 – you should see this:

2015-09-18 14_25_47-Ruby on Rails_ Welcome aboard

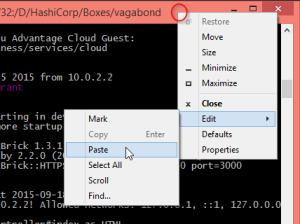
TIP: you can copy paste code by right clicking git bash as such:

2015-09-18 14_27_46-MINGW32__D_HashiCorp_Boxes_vagabond

Any changes you make in your Rails project in your host machine is immediately picked up by the Rails server running in your guest Ubuntu machine.

When you’re done developing on Rails, press Ctrl-C to close the server.

Virtual Machine Management

After you have SSHed into the virtual machine via vagrant ssh, to exit it enter

exit

While you’re in SSH to get out of the virtual machine. Once you are out, run:

vagrant halt

to shutdown the virtual machine, and

vagrant up

to boot it again.

Finally, to completely wipe the virtual machine from the disk destroying all its contents:

vagrant destroy

In git 2.5.2, the above command in git bash causes the error:

Vagrant is attempting to interface with the UI in a way that requires
a TTY. Most actions in Vagrant that require a TTY have configuration
switches to disable this requirement. Please do that or run Vagrant
with TTY.

You either run vagrant destroy in the normal command prompt, or use

vagrant destroy --force

Doing the above will not prompt for any confirmation.

Troubleshooting

Virtualization Technology Problem

You know you got this issue when you have vagrant and VirtualBox installed (or reinstalled a dozen times) and restarted (a dozen times) and yet when you do vagrant up, it states otherwise:

The guest machine entered an invalid state while waiting for it
to boot. Valid states are ‘starting, running’. The machine is in the
‘poweroff’ state. Please verify everything is configured
properly and try again.

If the provider you’re using has a GUI that comes with it,
it is often helpful to open that and watch the machine, since the
GUI often has more helpful error messages than Vagrant can retrieve.
For example, if you’re using VirtualBox, run `vagrant up` while the
VirtualBox GUI is open.

The primary issue for this error is that the provider you’re using
is not properly configured. This is very rarely a Vagrant issue.

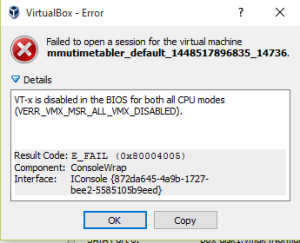
Also, when you run VirtualBox and try to start one of the machines there, you have this error:

Failed to open a session for the virtual machine mmutimetabler_default_1448517896835_14736.

VT-x is disabled in the BIOS for both all CPU modes (VERR_VMX_MSR_ALL_VMX_DISABLED).

VT-x is disabled in the BIOS for both all CPU modes

This issue appears a few times during the course of setting up a couple of different laptops. There are 2 possible cases:

  1. Your CPU does not support Virtualization Technology (VT-x).
  2. Your CPU supports it, but it is disabled.

For the first case, you must be running some really ancient hardware (i.e. Pentium C), and this rails setup is not going to be possible for you until you buy new hardware. This is the case if you boot up to the advanced options in your BIOS and you find that there is no Virtualization Technology option. For the second case, you just need to boot to your BIOS and enable it.

Check out

for further information to resolve your issue.

PostgreSQL

If you are using PostgreSQL, you might encounter this FATAL: role “vagrant” does not exist error:

FATAL role vagrant does not exist Action Controller_ Exception caught

To fix the vagrant role problem, enter this code in ssh mode (make sure you shut down your rails server first):

sudo -u postgres createuser -s -d -r -e vagrant

That should resolve that issue. Note that you need to execute all postgres commands the same way (prefix “sudo -u postgres“). For example:

sudo -u postgres createdb TimeTabler_development

You may also realize that you also can’t access the psql for the exact same error. To work around this, access psql like this:

sudo -u postgres psql postgres

You exit the terminal as such:

\quit

Conclusion

In brief, you just run your Rails application in a Ubuntu machine in your Windows machine. Stay tune for more!

UPDATE: A continuation of this post is up: phpPgAdmin On Linux On Windows With Vagrant.